Phonegap Android development environment for Windows
Posted in dev-sys on June 19, 2014
Assuming you want to develop HTML5 apps to run on mobile devices using Phonegap/Cordova then the easiest place to start is Android if you're a Windows user as you don't need a separate Mac, you don't even need a device to test on as there's an emulator.
Anyway, I've had to do this three times on various machines now, so here's a step by step guide for next time!
Android Developer Tools
Extract the tools somewhere, the zip should contain 2 folders, the SDK and Eclipse. Using Eclipse is optional (I don't) but the SDK manager.exe will be needed at some point. It allows you to manage the versions of Android you have available for testing via the emulator and also allows you configure various emulators.
For the sake of this document we just need to ensure that we have the USB driver installed so fire up the SDK Manager and find the correct entry. Install this and any updates to the default installed Android APIs.

Java & Ant
Install the JDK (not just the JRE)
Note where it installed it, for me this was C:Program FilesJavajdk1.8.0_05
Install ANT
I extracted it to the same top level Java folder, so my C:Program FilesJava folder looks like:

Paths
You need to set some paths so you and Cordova can access the tools:
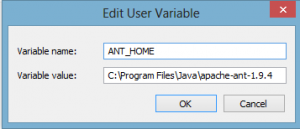
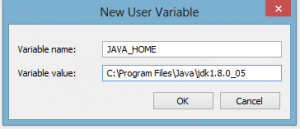
Also edit, the path to add this:
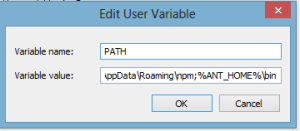
Keep that last windows open, for Cordova we need to ensure that the android dev tools are also in the path, for me I added:
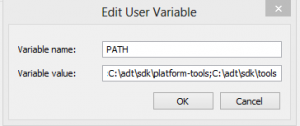
Restart your cmd/powershell and type ant, you should get a complaint that build.xml does not exist.
Also try running adb devices you should get sensible output.
Install GIT
I already had this, I suggest you make sure git is in your path before you continue further, some of the install commands below use git cloning.
Install nodejs
Select defaults (one is to add it to the path)
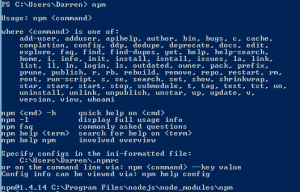
Running npm in powershell you should see:
Install Cordova
You could install phonegap and this all will still probably work, but as they've now branched from each other and may change in time I fancy sticking with the explicit cordova tree for now. All the docs mention cordova and phonegap interchangeably anyway.
npm install -g cordova
Install Ionic
Ionic is a JS and CSS framework that utilises AngularJS. As a package it gives you an MVC framework and, most importantly for me, an out of the box great UI to start you off.
npm install -g ionic
Hello World
Let's build a demo app and run it on a device so we know we have a full end-to-end setup working.
If you don't have an Android device use the SDK manager to 'manage AVDs' and create a virtual device. If you're using the emulator on Intel then I stongly suggest that you read this and make sure you install HAXM installer using the SDK manager (see above).
Firstly enable USB debugging on the device, I'm using my Moto G, then run adb devices on the CLI. If nothing shows up try seeing if there are any drivers for your phone, I had to install these.
Once installed I unplugged and plugged back in my phone and on the phone was asked to trust the computer. A re-run of adb devices__ now shows:

Sweet.
Now let's show a vanilla app on the phone
Type:
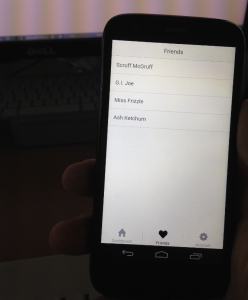
ionic start myApp tabs cd myApp ionic platform add android ionic run android
This last command will build the app then automatically copy it over onto your device.
Ongoing dev
Now we know we have a working end-to-end system we can focus on the app, not messing around with the build environment. Your options are to develop against the emulator or keep copying onto the test device whenever you make changes but this does introduce a bit of a lag so the obvious option, particularly when just doing UI layout and styling, is to use your web browser
On the CLI navigate to your project's root (myApp in this demo) and change to the www folder
Then run this:
python -m SimpleHTTPServer 8000
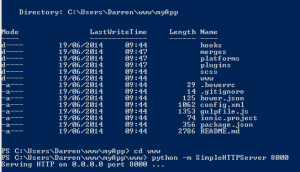
If you don't have Python installed and in your path you might want to go install and set it up first.
When you see the Serving …. Line, open your browser and navigate to localhost:8000
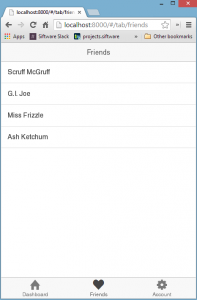
Job done. Code away.
Next on the list is iOS then WP8, we'll leave those for another day.